Introduction
As Independence Day approaches, there’s a palpable sense of excitement in the air. It’s a time when friends, families, and communities come together to celebrate the spirit of freedom and the birth of our great nation. While fireworks light up the sky and patriotic melodies fill the air, it’s also an opportunity to slow down, reflect, and reconnect with the traditions and flavors that have shaped our collective heritage.
In the era of bustling cities and convenience-driven lifestyles, there’s something incredibly grounding about stepping back in time and embracing the homesteading and small farm traditions of yesteryears. The Fourth of July provides the perfect occasion to channel our inner pioneers and cherish the simple joys of cultivating our own food, cooking with love, and savoring the fruits of our labor.
In this post, we invite you to take a journey with us through time as we explore five delightful recipes. These recipes, passed down through generations, are not only delicious but also carry the weight of tradition and the essence of our nation’s history. They embody the resourcefulness, resilience, and spirit of independence that have shaped our country.
So, as you gather around the grill and set the table for a festive Fourth of July celebration, we encourage you to infuse your menu with the charm and authenticity of old-fashioned charm. From the comforting creaminess of Grandma’s Classic Potato Salad to the mouthwatering aroma of an Old-Fashioned Apple Pie, each dish carries the stories of countless Fourth of July gatherings from days gone by.
These recipes not only pay homage to our forefathers, but also remind us of the importance of self-sufficiency, sustainability, and the power of community. They evoke memories of backyard barbecues, homemade lemonade stands, and the joy of sharing a meal with loved ones. With every bite, you’ll be transported back to a simpler time when life revolved around the land, family, and the pursuit of happiness.
So, put on your apron, gather the freshest ingredients from your garden or local farm, and embrace the spirit of self-reliance as you prepare these old-fashioned dishes. Whether you’re a seasoned homesteader, a small farm enthusiast, or simply someone looking to add a touch of nostalgia to your Fourth of July celebration, these recipes will bring a sense of tradition and warmth to your table.
So, fire up the stove, let your culinary creativity shine, and let the flavors of the past guide you towards a truly unforgettable Fourth of July feast.
Southern-Style Pulled Pork Sandwiches
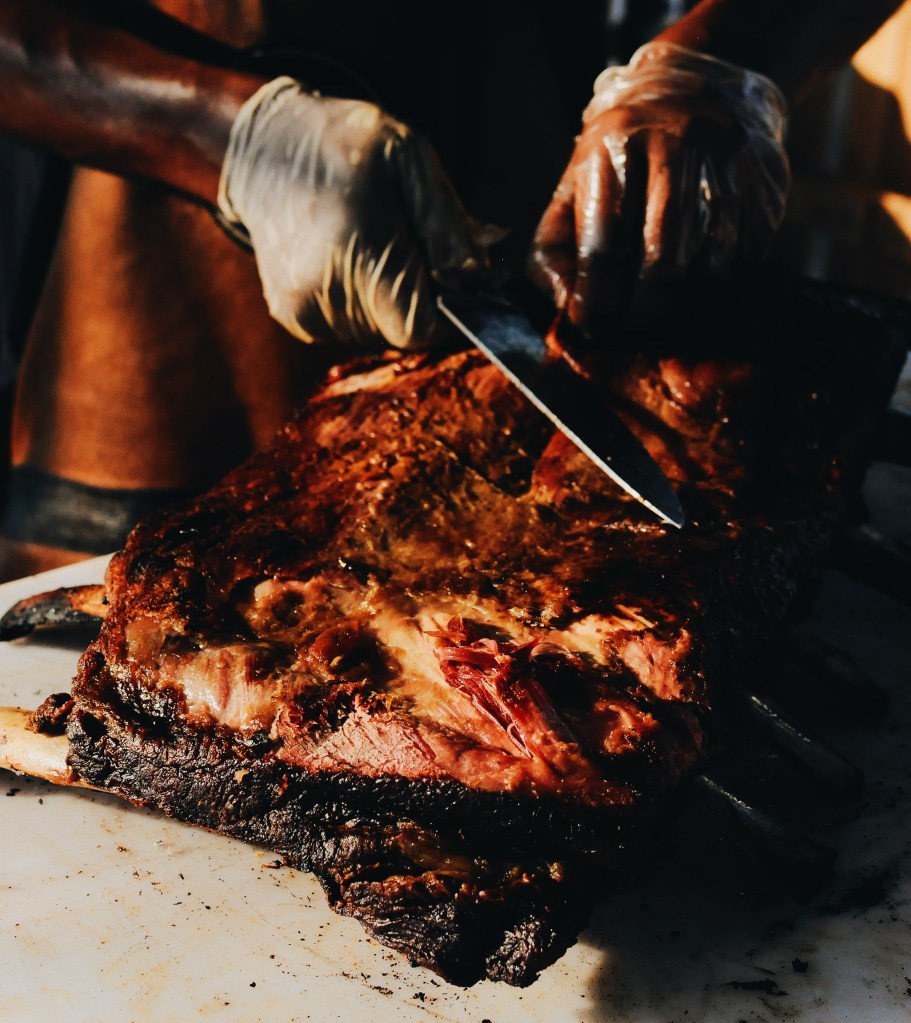
Prepare to start on a culinary journey to the heart of the American South with mouthwatering Southern-style pulled pork sandwiches. This classic dish reminds us of a time when barbecues were communal gatherings filled with laughter, the smell of smoke, and the unmistakable sound of sizzling meat. Get ready to channel your inner pit master and savor the smoky, tender goodness of this beloved Southern delicacy.
To start, select a well-marbled pork shoulder, also known as a pork butt, from your local farm or butcher. This cut of meat is ideal for slow cooking because it becomes incredibly tender and easily shreds when cooked low and slow. As you rub the meat with a blend of spices, such as paprika, garlic powder, cayenne pepper, salt, and black pepper, you’ll be transported to the rustic flavors of traditional Southern barbecue.
So, let’s fire up your grill or smoker. Traditionalists may opt for a charcoal or wood-fired smoker to infuse the pork with that irresistible smoky flavor. If you don’t have a smoker, fear not! You can achieve equally delicious results using a slow cooker or oven. The key is to cook the pork low and slow for several hours, about 1 ½ hour per pound at 2500F, allowing the flavors to meld and the meat to become incredibly tender. Cooking it with the fat side up, make sure the internal temp of the pork reaches 1600F for doneness, and up to 1900F for it to easily fall apart. It’s really up to your preferences for tenderness.
As the pork shoulder slowly cooks, your kitchen will be filled with the enticing aromas of smoky goodness. The anticipation builds as you patiently wait for the meat to reach that perfect state of tenderness, when it can be effortlessly pulled apart with a fork. This is a labor of love that requires patience and rewards you with succulent, melt-in-your-mouth pork.
Once the pork is cooked to perfection, remove it from the heat and let it rest. The meat will continue to cook for a bit after it has been removed from the heat. Wrap the meat in butcher’s paper and aluminum foil, followed by a towel to let the meat continue cooking for 30 minutes to an hour. Place the meat in a cooler after it’s been wrapped to rest. This will allow the internal temp to reach around 2050F, the protein fibers to relax and soak up the juices to remain moist. Then, remove the meat from the cooler to finish processing it. Using two forks or your hands (be careful, it’s still hot), gently pull the meat apart, shredding it into bite-sized pieces. This is where the magic happens—the tender pork, infused with the smoky spices, is transformed into succulent strands of flavor.
To serve the pulled pork, choose soft hamburger buns or brioche rolls that can withstand the juicy deliciousness of the meat. Assemble the sandwiches by piling generous amounts of pulled pork onto each bun. You can enhance the flavor further by adding your favorite barbecue sauce or a tangy vinegar-based coleslaw.
The first bite of your Southern-style pulled pork sandwich is a revelation—a symphony of smoky, tangy, and savory flavors that dance on your taste buds. The meat practically melts in your mouth, while the tangy sauce and crisp coleslaw provide the perfect balance of textures and flavors.
These sandwiches are best enjoyed with a side of homemade pickles, baked beans, or cornbread, transporting you to a quintessential Southern feast. As you savor each bite, you’ll feel a connection to the rich culinary traditions of the American South and the heritage of slow-cooked, smoky barbecue.
So, fire up your grill or slow cooker, gather your loved ones, and let the Southern-style pulled pork sandwiches take center stage at your Fourth of July gathering. Celebrate the flavors of the South and the joy of communal feasting as you indulge in this irresistible classic. And remember, no matter where you are, with each bite, you’ll feel the spirit of Southern hospitality and the timeless allure of traditional barbecue.
As a general guideline, a 5-6 pound pork shoulder can yield approximately 12-15 servings. However, this can vary depending on the appetites of your guests and any additional sides or accompaniments you serve. Adjust the quantities of ingredients and portion sizes based on your specific needs and enjoy the delightful flavors of this classic southern dish!
Ingredients
- Pork shoulder (5-6 pounds)
- Paprika (2 tablespoons)
- Garlic powder (2 tablespoons)
- Cayenne pepper (1 tablespoon)
- Salt (2 teaspoons)
- Black pepper (1 teaspoon)
- Soft hamburger buns or brioche rolls
- Barbecue sauce (optional, for serving)
- Vinegar-based coleslaw (optional, for serving)
Optional sides:
- Homemade pickles
- Baked beans
- Cornbread
Remember, this list serves as a guide for your grocery shopping, and you can adjust the quantities based on your desired number of servings and personal preferences. Enjoy your shopping and savor the deliciousness of Southern-style pulled pork sandwiches!
Southern Homemade Baked Beans Recipe
These beans, slow-cooked to perfection, are a staple at gatherings and barbecues across the South. With a rich and smoky flavor, they are the perfect accompaniment to grilled meats or a delightful main course paired with a slice of cornbread. Get ready to savor the heartiness and down-home goodness of this beloved southern classic.
To begin, select dried navy beans or Great Northern beans, known for their creamy texture and ability to absorb flavors. Give them a good rinse under cold water, ensuring there are no unwanted debris or stones. Then, place the beans in a large pot, cover them with water, and let them soak overnight. This step softens the beans and reduces their cooking time.
The next day, drain and rinse the soaked beans before placing them back in the pot. Cover the beans with fresh water and bring it to a vigorous boil over high heat. Once boiling, reduce the heat to low, cover the pot, and allow the beans to simmer gently for about 1 to 1 1/2 hours. Stir occasionally and add more water if needed to keep the beans submerged.
As the beans simmer and become tender, it’s time to prepare the flavorful sauce that will elevate them to new heights. In a separate bowl, combine finely chopped onion, molasses, brown sugar, ketchup, Dijon mustard, apple cider vinegar, and Worcestershire sauce. The amalgamation of these ingredients creates a harmonious blend of sweet, tangy, and savory flavors that will infuse the beans with irresistible taste.
Drain the cooked beans and transfer them to a baking dish or a Dutch oven. Pour the prepared sauce over the beans and gently stir until every bean is coated in the delectable mixture. Season with salt and pepper to taste, enhancing the overall flavor profile.
For an extra touch of indulgence, add the crowning jewel—crispy, smoky bacon. Cook four slices of bacon until they reach the perfect crispness. Crumble the bacon into small pieces, reserving some for garnish if desired. Fold the bacon into the beans, infusing them with its distinct smokiness and adding textural contrast.
Cover the baking dish or Dutch oven with a lid or aluminum foil, and place it in a preheated oven set to 325°F (160°C). Let the beans bake for 2 to 2 1/2 hours, allowing the flavors to meld together and the sauce to thicken. During this time, occasionally stir the beans to ensure even cooking and distribution of flavors.
As the aroma of the slow-cooked beans fills your kitchen, anticipation builds for the moment of indulgence. The dish emerges from the oven, fragrant and bubbling with savory goodness. Allow it to cool slightly before serving, as this allows the flavors to settle and intensify.
Southern Homemade Baked Beans are the epitome of comfort and Southern hospitality. They are best enjoyed hot, as a side dish alongside grilled meats or as a main course that satisfies the most discerning palate. The tender beans, enveloped in a luscious, smoky sauce, are a testament to the rich culinary heritage of the South.
As a rough estimate, this recipe can yield approximately 8 to 10 servings as a side dish. However, it’s always a good idea to adjust the quantities based on your specific needs and the appetites of your guests.
Ingredients
- 1 pound dried navy beans or Great Northern beans
- 1 medium onion, finely chopped
- 1/2 cup molasses
- 1/4 cup brown sugar
- 1/4 cup ketchup
- 2 tablespoons Dijon mustard
- 2 tablespoons apple cider vinegar
- 1 tablespoon Worcestershire sauce
- 4 slices bacon, cooked and crumbled
- Salt and pepper to taste
- Water
Grandma’s Classic Potato Salad
There’s something undeniably comforting and nostalgic about Grandma’s Classic Potato Salad. It’s a dish that takes us back to simpler times, where gatherings were filled with laughter, good food, and the love of family. As you prepare this beloved recipe, you can almost hear the echoes of conversations and the clinking of silverware from generations past.
To start, gather a batch of fresh, firm potatoes from your garden or a local farm. We prefer to use either red potatoes or Yukon gold. The texture and flavor of homegrown potatoes truly elevate this dish, but store-bought works if that’s all you have. Peel the potatoes and cut them into bite-sized chunks, then boil them until tender. While the potatoes are cooking, take a moment to appreciate the earthy aroma that fills your kitchen. It’s a scent that conjures memories of summertime picnics and Fourth of July barbecues.
Once the potatoes are cooked, drain them and allow them to cool slightly. While they’re still warm, transfer them to a large mixing bowl. Now, it’s time to add the magic ingredients that make this potato salad so irresistible. Start with hard-boiled eggs, carefully peeled and chopped into small pieces. The creamy yolks and tender whites add a delightful richness to the dish.
Next, add a generous dollop of mayonnaise to the bowl. Grandma’s recipe always called for just the right amount of mayo to create a luscious, creamy base that coats the potatoes and eggs. Don’t forget the tangy kick of mustard! Add a spoonful or two to give the salad a subtle zing that cuts through the richness.
To add some crunch and freshness, finely chop celery and onion and toss them into the mix. These vegetables provide a delightful contrast to the creamy potatoes and eggs, adding texture and a hint of mild spiciness. Finally, season the salad with salt and pepper, adjusting the flavors to your liking. Some traditionalists might even sprinkle a touch of paprika on top for a pop of color and a hint of smokiness.
Now comes the hard part—resisting the temptation to sneak a taste before it’s chilled! Allow the potato salad to cool in the refrigerator for at least a couple of hours to let the flavors meld together. This step is crucial for achieving that signature potato salad taste that we all know and love.
When it’s time to serve, take a moment to appreciate the beautiful sight before you. The creamy potatoes, flecks of herbs, and pops of vibrant colors create a visual feast. Scoop generous portions onto plates, or better yet, set out a big bowl of potato salad for everyone to enjoy family-style.
As you savor each bite, you’ll find yourself transported to a time when life moved at a slower pace. You’ll taste the love and care that went into every ingredient, and you’ll feel the warmth of shared meals and cherished memories. Grandma’s Classic Potato Salad isn’t just a dish—it’s a celebration of tradition, family, and the enduring flavors that connect us across generations.
This recipe should yield approximately 6 to 8 servings. However, you can easily adjust the quantities of ingredients to accommodate a larger or smaller gathering.
Ingredients
- Potatoes (about 2 pounds)
- Hard-boiled eggs (4)
- Mayonnaise (1 cup)
- Mustard (2 tablespoons)
- Celery, finely chopped (1/2 cup)
- Onion, finely chopped (1/4 cup)
- Salt (to taste)
- Pepper (to taste)
- Paprika (for garnish)
Remember, this list is meant to serve as a grocery shopping guide, so adjust the quantities based on your specific needs and the number of servings you want to prepare. Enjoy your shopping and happy cooking!
Old-Fashioned Apple Pie
When it comes to classic American desserts, few can rival the timeless appeal of an Old-Fashioned Apple Pie. As you embark on this culinary journey, you’ll be transported to a time when the aroma of freshly baked pies filled the kitchen and drew loved ones together. The combination of flaky crust, sweet apples, and warming spices evokes a sense of comfort and nostalgia that is perfect for a Fourth of July celebration.
To begin, gather a variety of crisp and tart apples, such as Granny Smith or McIntosh. Head to your local orchard or farmers’ market to select the freshest, in-season apples available. The vibrant colors and fragrant aroma of these apples will enhance the overall flavor of your pie.
Peeling and slicing the apples is a labor of love that connects you to the generations of bakers who came before. As the knife glides through the skin, revealing the juicy flesh beneath, you’ll feel a sense of anticipation for the delightful treat that awaits. Slice the apples thinly and toss them in a mixture of sugar, cinnamon, nutmeg, and a squeeze of lemon juice. These simple ingredients will elevate the natural sweetness of the apples and create a harmonious blend of flavors.
Now, it’s time to prepare the crust—the foundation of any exceptional apple pie. Some bakers prefer a buttery, homemade crust, while others opt for the convenience of a store-bought one. Whichever route you choose, ensure that your crust is flaky and golden. Roll out the dough, carefully line your pie dish, and fill it with the aromatic apple mixture. Don’t forget to dot the top of the filling with small cubes of butter, which will melt into a rich, indulgent sauce as the pie bakes.
As the pie bakes in the oven, your kitchen will be enveloped in a fragrance that is both intoxicating and familiar. The scent of cinnamon and warm apples will evoke memories of cozy gatherings and festive celebrations. Be patient as you wait for the crust to turn a beautiful golden brown and the filling to bubble with sweet juiciness.
When the pie is ready, it’s essential to let it cool slightly before serving. This allows the juices to settle, ensuring each slice holds together beautifully. As you cut into the pie, you’ll witness the marriage of flavors—a symphony of sweet apples, warming spices, and buttery crust.
Consider serving your Old-Fashioned Apple Pie with a scoop of homemade vanilla ice cream or a dollop of freshly whipped cream. The contrast of creamy, cool sweetness against the warm pie is a match made in dessert heaven. As you savor each bite, you’ll experience the true essence of Americana—a blend of tradition, flavor, and a sense of belonging.
Generally speaking, a standard 9-inch pie dish can yield around 8 to 10 servings. However, you can adjust the portion sizes to accommodate your needs and the appetites of your guests.
Ingredients
For the crust:
- Homemade or store-bought pie crust (for a double-crust pie)
For the filling:
- Apples (about 6 cups, peeled, cored, and thinly sliced)
- Granulated sugar (3/4 cup)
- Ground cinnamon (1 teaspoon)
- Ground nutmeg (1/2 teaspoon)
- Lemon juice (1 tablespoon)
- Unsalted butter, cut into small cubes (2 tablespoons)
Optional:
- Homemade vanilla ice cream or whipped cream (for serving)
Remember, this list serves as a guide for your grocery shopping, and the quantities can be adjusted based on your preferences and the size of your pie dish. Enjoy your shopping and have a wonderful time baking your Old-Fashioned Apple Pie!
Southern Deviled Eggs Recipe
Prepare to delight your taste buds with a classic Southern appetizer that exudes charm and flavor—Southern Deviled Eggs. These delectable bites are a staple at Southern gatherings, picnics, and potlucks, captivating guests with their creamy filling, tangy notes, and a subtle touch of heat. Get ready to elevate this beloved appetizer to new heights and experience the true essence of Southern hospitality.
First, boil and prep the eggs to begin. Take six large eggs and place them in a single layer in a saucepan. Ensure they are fully covered with cold water. Allow the water to come to a gentle boil over medium-high heat. Once boiling, reduce the heat to low and let the eggs simmer gracefully for about 9 to 12 minutes. This cooking method guarantees eggs with perfectly cooked whites and lusciously creamy yolks. Once cooked, transfer the eggs to an ice bath, ensuring a quick and thorough cool-down process.
Next, it’s time to reveal the hidden goodness once the eggs have cooled. With care and precision, delicately peel each egg under cool running water. Employ a gentle tapping technique to create cracks in the shell, then roll the egg between your hands to loosen the shell. Begin peeling from the wider end, where the air pocket resides. With finesse, remove the shell to uncover flawlessly smooth and intact eggs, ready to be transformed into divine deviled eggs.
For the next step, craft the irresistible filling. Slice each egg in half lengthwise. Gently remove the yolks and transfer them to the mixing bowl. Now add ¼ cup of mayonnaise, 2 teaspoon of yellow mustard, ¼ cup of diced sweet pickles (homemade sweet pickles are the best, but store-bought works in a pinch), and ¼ teaspoon of celery seed. Embrace the flavors of the South as you season with salt and pepper to taste. Now, armed with a fork or a whisk, unleash your culinary prowess and mash, mix, and blend the ingredients until they harmonize into a smooth and velvety filling. Adjust the seasonings according to your personal preferences, aiming to strike the perfect balance of flavors.
Now, with the filling prepared, it’s time to assemble the deviled eggs. Use a spoon to carefully fill each egg white half with the heavenly yolk mixture.
The deviled eggs are now nearly complete, but no Southern dish like this is truly finished without a little extra touch. Sprinkle a pinch of paprika over each deviled egg, infusing them with a vibrant hue and a hint of smokiness. For an added burst of freshness, delicately scatter finely chopped fresh chives on top, adding a delightful green accent to these captivating creations.
Next, allow the flavors to meld and the filling to set, refrigerate the deviled eggs for at least 30 minutes before serving. This brief interlude heightens the anticipation and ensures a more enjoyable dining experience. The moment arrives to savor these creamy, tangy, and slightly spicy morsels, perfectly encapsulating the essence of Southern cuisine.
Southern Deviled Eggs are the epitome of Southern hospitality and a delightful addition to any gathering or celebration, including Fourth of July festivities. These appetizing bites capture the essence of the South, captivating both the palate and the heart. So, embrace the spirit of Southern charm and indulge in the classic flavors of this beloved Southern dish. Let the Southern Deviled Eggs be the star of your culinary spread, creating unforgettable memories and bringing people together around the table.
Ingredients
- 6 large eggs
- 1/4 cup mayonnaise
- 2 teaspoon yellow mustard
- 1/4 cup sweet pickle relish (diced homemade sweet pickles, if available)
- 1/4 teaspoon celery seed
- Salt and pepper to taste
- Paprika, for garnish
- Fresh chives, finely chopped, for garnish
Note: Feel free to adjust the quantities of the ingredients based on your preferences and the number of servings you’d like to make.
Conclusion
As you prepare these dishes, we hope that you’ll connect with the spirit of independence and community by celebrating your freedom to peaceably assemble with family and friends. These delicious, old-fashioned recipes serve to remind us of simpler times, when the kitchen was the heart of the home and homemade goodness brought people together.
These Southern culinary delights carry with them a rich tradition that has been passed down from generation to generation. They represent more than just flavors on a plate; they embody a sense of heritage and a connection to the past. So, we encourage you to slow down, savor the flavors, and create lasting memories with loved ones.
Remember, the true essence of Independence Day is a celebration of the birth of a nation and where we are endowed with certain inalienable rights. The rights of life, liberty and the pursuit of happiness. So, raise a glass of your preferred beverage, gather around the table, savor the smoky aroma of baked beans, relish the creamy delight of deviled eggs, and indulge in the flavors of southern hospitality. On this Fourth of July, may your celebrations be filled with love, joy, and the unmistakable taste of home. Happy Fourth of July!
Subscribe now to never miss a post from Skillful Living…


