Introduction
Are mosquitoes and other pesky insects causing havoc on your homestead or small farm? Instead of resorting to chemical-laden solutions, why not turn to nature’s own bug fighters? In this post, we’ll explore five plants that not only repel mosquitoes and other unwanted insects but, also offer practical benefits for your homestead or small farm. These plants not only contribute to a healthy ecosystem but also provide aromatic beauty and functional uses. So, read on to discover how these natural mosquito repellents can help you create a harmonious and pest-free environment on your homestead or small farm.
Citronella Grass
Citronella grass is a superstar when it comes to repelling mosquitoes. Its distinct lemony fragrance masks the scents that attract these pesky insects, making it an essential addition to any outdoor space. In addition to its mosquito-repelling abilities, citronella grass is easy to grow and adds a touch of elegance to your garden.
Selecting the Perfect Location: To ensure optimal growth of your citronella grass, choose a location that receives full sun or partial shade. This plant thrives in warm climates but can tolerate cooler temperatures as well. Make sure the chosen spot has well-drained soil to prevent waterlogging and root rot.
Planting Citronella Grass: You have two options for planting citronella grass: in large containers or directly in the ground. If you opt for containers, select pots that are at least 12 inches in diameter and have drainage holes. This allows for proper root development and prevents water from stagnating around the roots. If planting in the ground, dig a hole that is twice the size of the root ball and gently loosen the soil.
When planting multiple citronella grass plants, space them about three feet apart to provide adequate airflow and prevent overcrowding.
Watering and Moisture: Citronella grass requires consistent moisture to thrive. Water the plants deeply once a week, allowing the soil to dry out slightly between watering sessions. Avoid overwatering, because it can lead to root rot. Monitor the soil moisture level by sticking your finger about an inch into the soil. If it feels dry, it’s time to water. During periods of high heat or drought, you may need to water more frequently.
Fertilizing Citronella Grass: To keep your citronella grass healthy and vibrant, fertilize it every three months using a balanced organic fertilizer. Choose a fertilizer with equal amounts of nitrogen (N), phosphorus (P), and potassium (K). Follow the instructions on the fertilizer packaging for proper application rates. Applying fertilizer encourages robust growth and enhances the plant’s ability to repel mosquitoes.
Pruning and Maintenance: Regular pruning helps to maintain the appearance and vitality of your citronella grass. Trim any dead or damaged foliage to promote new growth. You can also cut back the plants in late winter or early spring to encourage fresh growth before the active mosquito season begins.
Overwintering Citronella Grass: If you live in an area with cold winters, you’ll need to protect your citronella grass from frost damage. Before the first frost, trim the plant back to about six inches above the ground. Apply a layer of mulch around the base to insulate the roots. Alternatively, you can transplant your potted citronella grass indoors for the winter and place it near a sunny window.
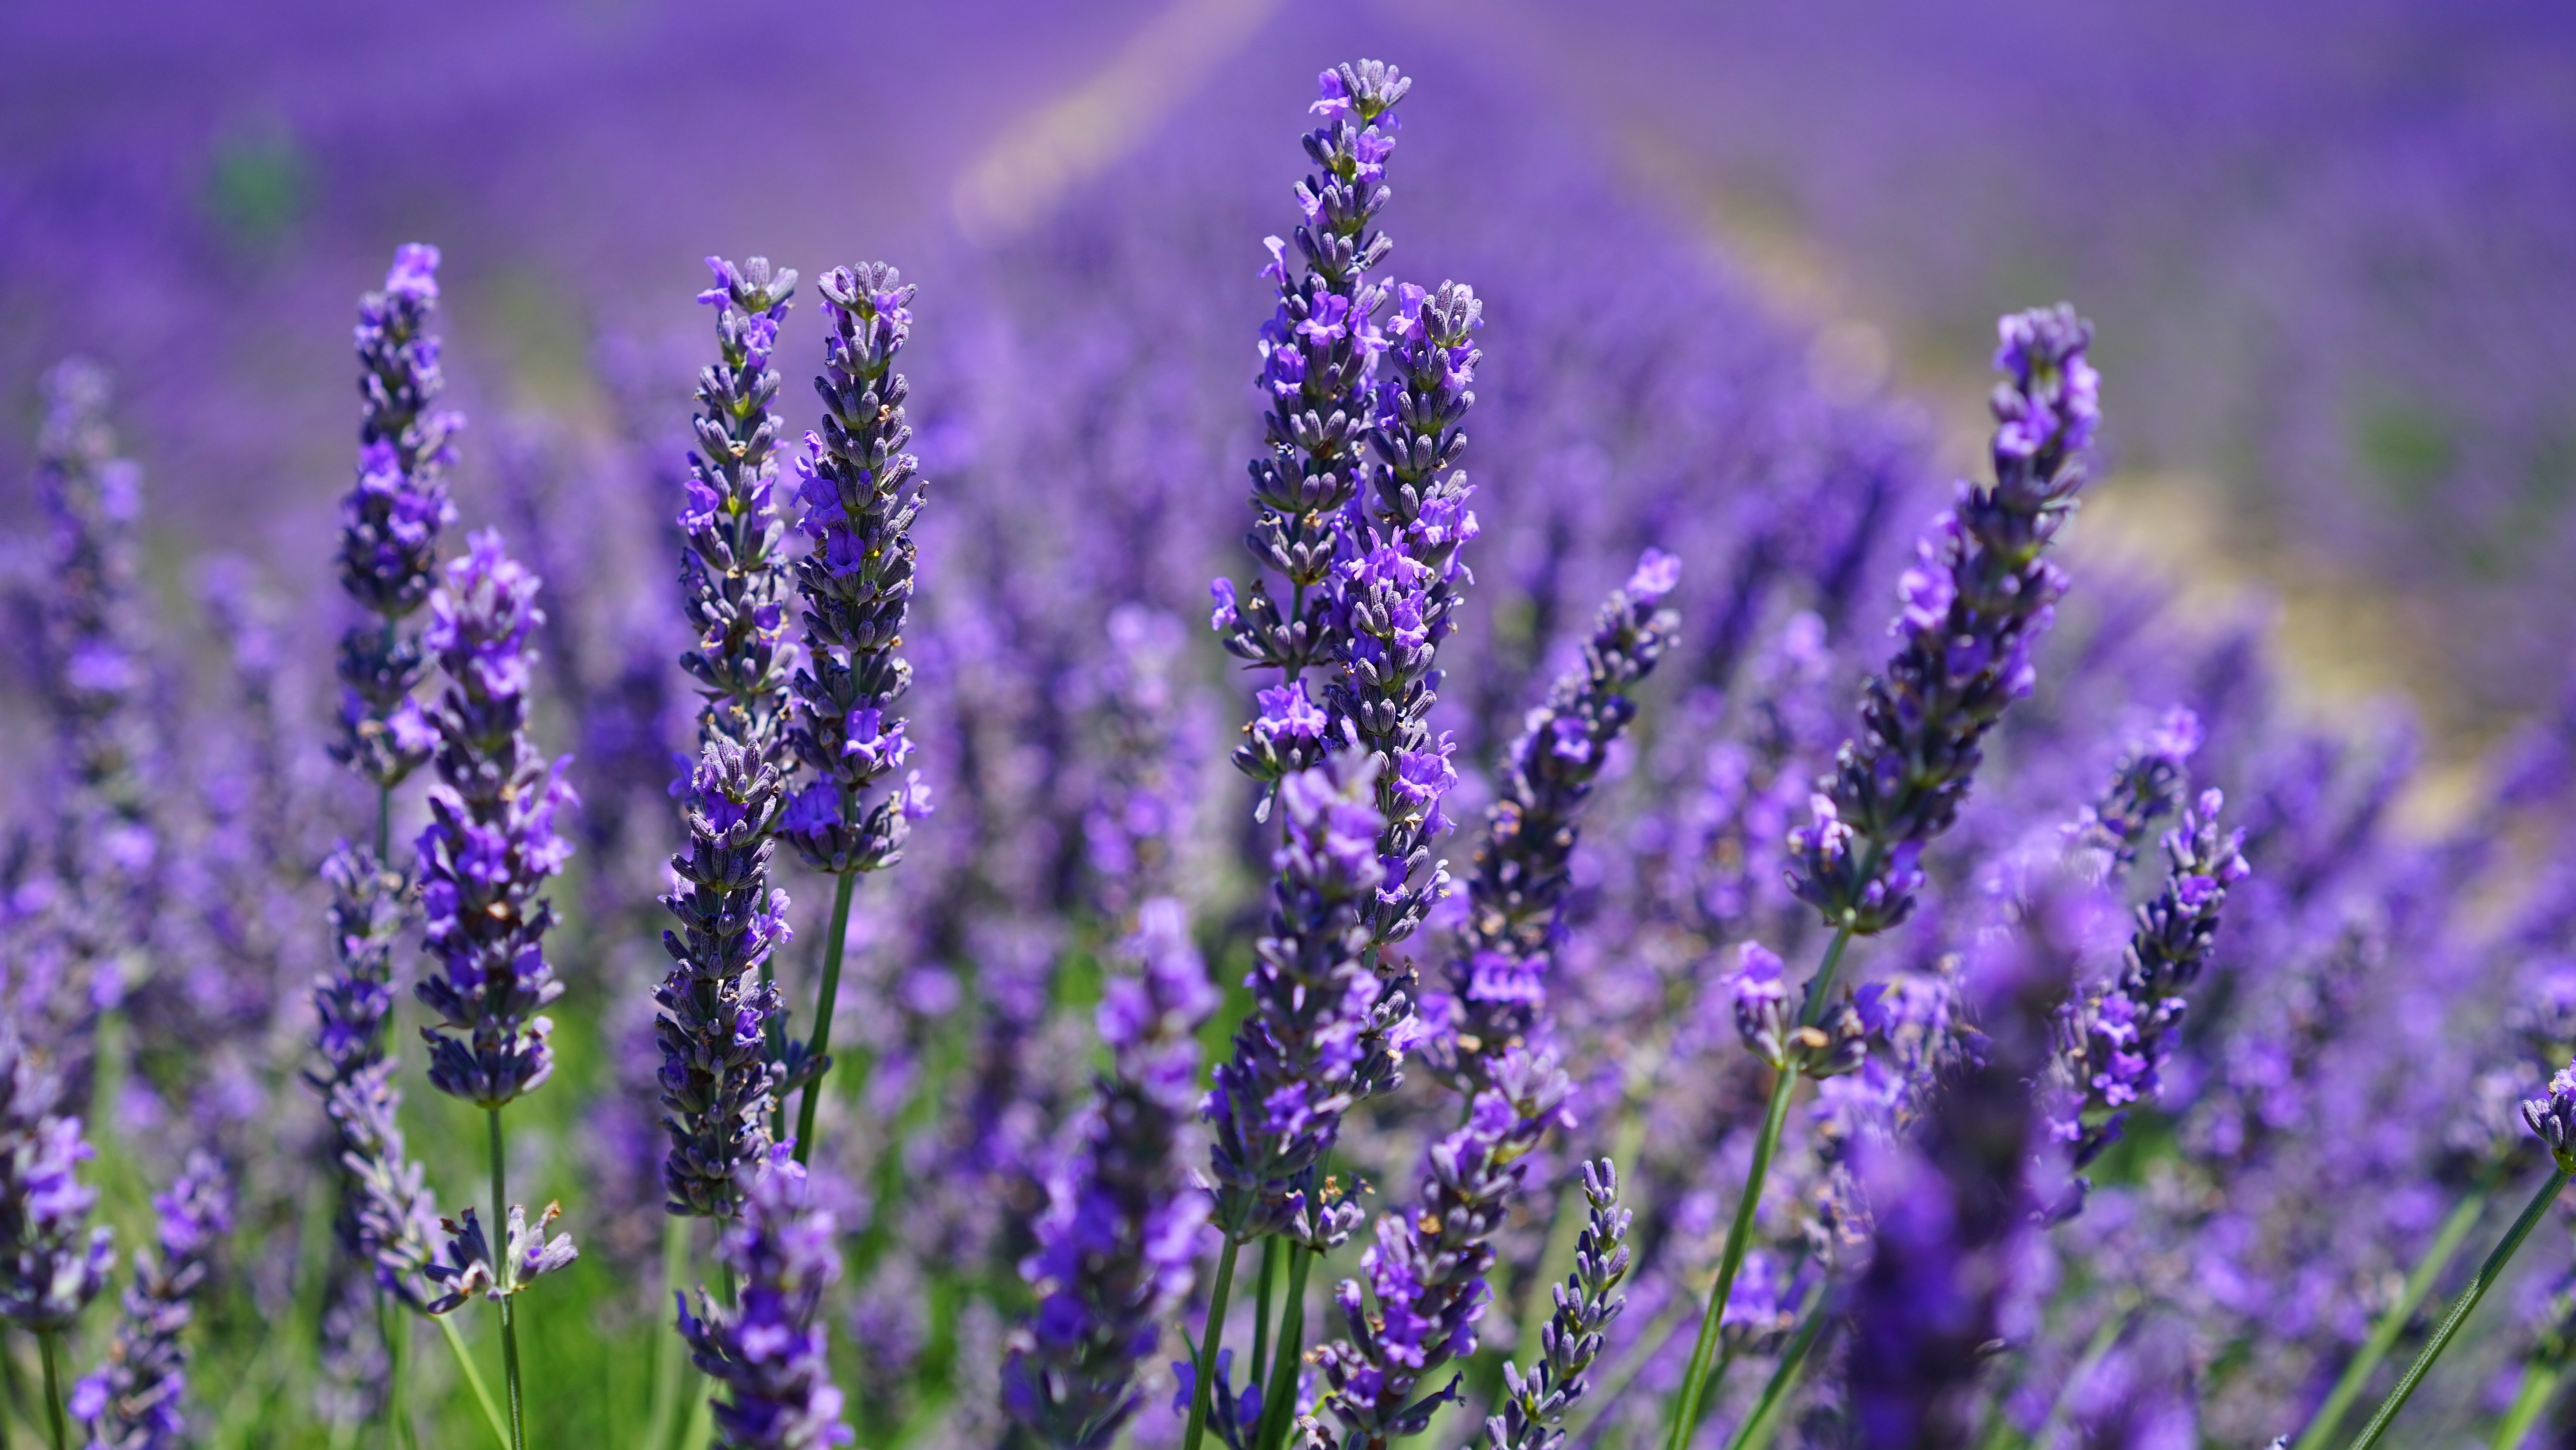
Lavender
Lavender is not only a delightful herb with its calming fragrance but, also an excellent natural mosquito repellent. Adding lavender to your garden not only repels mosquitoes but, also attracts pollinators like bees and butterflies, making it a beautiful and beneficial addition to your outdoor space.
Selecting the Perfect Location: Lavender thrives in sunny locations, so choose a spot in your garden that receives at least six to eight hours of direct sunlight daily. Lavender plants also prefer well-drained soil to prevent root rot. If your soil is heavy or clay-like, consider improving its drainage by adding organic matter such as compost or sand.
Planting Lavender: You can start growing lavender from either seeds or nursery-bought seedlings. If using seeds, start them indoors 6-8 weeks before the last frost date, because lavender takes some time to germinate. Transplant the seedlings outdoors once the soil has warmed up and there is no risk of frost.
When planting lavender, space the plants about 12 to 18 inches apart to allow for proper air circulation and to prevent the growth of fungal diseases. Dig a hole that is slightly larger than the root ball, gently place the plant in the hole, and backfill with soil. Tamp the soil lightly around the plant to ensure good contact with the roots.
Watering and Moisture: Lavender is a drought-tolerant plant once established, but it still requires consistent watering during its initial growth phase. Water the plants deeply once a week, allowing the soil to dry out between watering sessions. Be careful not to overwater, because lavender prefers slightly drier conditions. Avoid overhead watering, which can lead to fungal diseases. Instead, direct the water to the base of the plant.
Fertilizing Lavender: Lavender doesn’t require heavy fertilization and actually thrives in lean soil. In early spring, you can apply a slow-release organic fertilizer or a small amount of well-balanced granular fertilizer around the base of the plants. Be sure to follow the manufacturer’s instructions regarding the application rate. Avoid over-fertilizing, since this can result in excessive foliage growth at the expense of flowers.
Pruning and Maintenance: Regular pruning helps to keep lavender plants healthy and promotes bushier growth. Prune your lavender plants in early spring, just as new growth emerges. Trim back about one-third of the plant, cutting above the woody growth to encourage new shoots. This helps maintain the plant’s shape and prevents it from becoming woody and leggy. Additionally, deadhead spent flowers throughout the blooming season to encourage continuous flowering.
Overwintering Lavender: Lavender is a hardy perennial in many regions, but it may require protection in colder climates. Before winter arrives, add a layer of mulch around the base of the plants to insulate the roots and protect them from frost. Avoid covering the entire plant with mulch, because this can lead to excess moisture and root rot. In extremely cold regions, you can also cover the plants with burlap or a frost cloth to provide additional protection.
Marigolds
Marigolds are not only known for their vibrant colors and cheerful blooms but also for their ability to repel mosquitoes and other unwanted insects. By incorporating marigolds into your garden, you can create a natural barrier against these pesky bugs while adding a splash of beauty to your outdoor space.
Selecting the Perfect Location: Marigolds thrive in full sunlight, so choose a location in your garden that receives at least six hours of direct sunlight each day. While marigolds can tolerate some shade, they will produce the most blooms and have the strongest mosquito-repelling effect in full sun. Ensure the soil is well-drained to prevent waterlogging and root rot.
Planting Marigolds: Marigolds are easy to grow from seeds or young seedlings. If starting from seeds, sow them directly into the soil after the last frost date, following the instructions on the seed packet. Alternatively, you can purchase young marigold plants from a local nursery and transplant them into your garden.
When planting marigolds, space them about 8-12 inches apart, allowing enough room for their mature size. Dig a hole slightly larger than the root ball, place the plant in the hole, and backfill with soil. Gently firm the soil around the plant to ensure good contact with the roots.
Watering and Moisture: Marigolds prefer moderately moist soil, but they are relatively drought-tolerant once established. Water the plants regularly, keeping the soil evenly moist but not waterlogged. Avoid overwatering, because excessive moisture can lead to root rot and other fungal diseases. Water at the base of the plant to prevent wetting the foliage, which can also invite diseases.
During hot and dry periods, you may need to increase the frequency of watering to ensure the soil doesn’t dry out completely. Adding a layer of organic mulch around the base of the plants can help retain moisture, suppress weed growth, and maintain more consistent soil conditions.
Fertilizing Marigolds: Marigolds are not heavy feeders, but a light application of fertilizer can promote healthy growth and abundant blooms. Prior to planting, incorporate compost or well-rotted organic matter into the soil to improve its fertility and structure. This provides a good foundation of nutrients for the plants.
Once the marigolds are established, you can apply a balanced water-soluble fertilizer every two to three weeks during the growing season. Follow the instructions on the fertilizer packaging for the recommended dilution rate and application method. Be careful not to over-fertilize, because this can lead to excessive foliage growth with fewer flowers.
Deadheading and Maintenance: To encourage continuous blooming, it’s essential to deadhead spent flowers regularly. Remove faded blooms by pinching them off at the base of the stem. Deadheading redirects the plant’s energy toward producing new flowers rather than seed production.
Additionally, monitor your marigold plants for any signs of pests or diseases. Inspect the foliage regularly for aphids, caterpillars, or other common garden pests. If you notice any infestations, treat them promptly with organic insecticidal soap or other appropriate natural pest control methods.
Basil
Basil is not just a popular herb for culinary delights; it also doubles as an effective mosquito repellent. Its aromatic foliage releases a fragrance that mosquitoes find repulsive, making it a fantastic addition to your garden or patio. By growing basil, you can enjoy its culinary benefits while keeping those annoying bugs away.
Selecting the Perfect Location: Basil thrives in warm and sunny conditions, so choose a location in your garden that receives at least six to eight hours of direct sunlight each day. It’s important to note that basil is sensitive to cold temperatures, so avoid planting it outdoors until all danger of frost has passed. Basil also prefers well-drained soil with a slightly acidic to neutral pH level.
Planting Basil: You can start growing basil from either seeds or young seedlings. If starting from seeds, sow them indoors about six to eight weeks before the last frost date or directly in the garden after the soil has warmed up. To ensure successful germination, place the seeds in a warm location and keep the soil consistently moist until they sprout.
If using seedlings, transplant them outdoors once they have developed a few sets of true leaves. Space the basil plants about 12 to 18 inches apart, allowing sufficient airflow and room for growth. Dig a hole slightly larger than the root ball, place the plant in the hole, and gently firm the soil around it.
Watering and Moisture: Basil plants require consistent moisture to thrive but can be sensitive to overwatering. Water the plants deeply once a week, allowing the top inch of soil to dry out between watering sessions. Avoid overhead watering, because wet foliage can invite fungal diseases. Instead, aim to water at the base of the plant, directing the water to the soil.
During periods of extreme heat or drought, basil may benefit from additional watering. However, it’s important to strike a balance and avoid waterlogged conditions. Applying a layer of organic mulch around the plants can help conserve soil moisture, regulate temperature, and suppress weed growth.
Fertilizing Basil: Basil plants benefit from regular feeding to promote healthy growth and maximize their aromatic properties. Prior to planting, incorporate compost or well-rotted organic matter into the soil to provide a nutrient-rich environment. This will supply the basil plants with a good foundation of essential nutrients.
Once the basil is established, you can apply a balanced organic fertilizer every four weeks during the growing season. Follow the instructions on the fertilizer packaging for the recommended application rates. Alternatively, you can feed the plants with a diluted liquid fish emulsion or seaweed fertilizer every two weeks.
Pruning and Harvesting: Regular pruning is essential for basil plants, because it helps promote bushier growth and prevents them from flowering too early. Pinch off the top two sets of leaves when the plant reaches about six inches in height. This encourages branching and ensures a more compact and productive plant.
When harvesting basil leaves for culinary purposes, avoid removing more than one-third of the plant at a time. Harvesting encourages the growth of new leaves and keeps the plant productive throughout the season. For the best flavor, harvest the leaves in the morning when the essential oils are most concentrated.
Overwintering Basil: Basil is a warm-season annual herb, which means it does not tolerate frost. In colder regions, basil will not survive the winter outdoors. However, you can extend its lifespan by transplanting it into pots and bringing it indoors before the first frost. Place the potted basil in a sunny location, such as a south-facing window, and continue to provide it with adequate water and occasional fertilization.
Rosemary
Rosemary is a versatile herb renowned for its fragrant foliage and culinary uses. However, it also possesses natural mosquito-repelling properties, making it an excellent addition to your garden. By incorporating rosemary into your outdoor space, you can enjoy its delightful scent while keeping those annoying mosquitoes away.
Selecting the Perfect Location: Rosemary thrives in sunny locations, so choose a spot in your garden that receives at least six hours of direct sunlight daily. Rosemary is tolerant of a wide range of soil conditions, but it prefers well-drained soil that is slightly alkaline. If your soil is heavy or clay-like, consider adding organic matter or sand to improve its drainage.
Planting Rosemary: You can start growing rosemary from seeds, cuttings, or young nursery-bought plants. Growing from cuttings or young plants is typically easier and more reliable. If starting from seeds, sow them indoors 10-12 weeks before the last frost date, because rosemary seeds can be slow to germinate.
When planting rosemary, space the plants about three feet apart to allow for their mature size. Dig a hole that is slightly larger than the root ball, gently place the plant in the hole, and backfill with soil. Firm the soil gently around the plant to ensure good contact with the roots.
Watering and Moisture: Rosemary is a drought-tolerant plant once established, but it requires regular watering during its initial growth phase. Water the plants deeply once a week, allowing the soil to dry out slightly between watering sessions. It’s important not to overwater rosemary, because it is susceptible to root rot in overly moist conditions.
During hot and dry periods, you may need to water more frequently to prevent the soil from completely drying out. However, always check the soil moisture before watering. Once rosemary is established, it prefers slightly drier conditions, so be mindful not to keep the soil consistently wet.
Fertilizing Rosemary: Rosemary doesn’t require heavy fertilization and can thrive in lean soil. Before planting, incorporate compost or well-rotted organic matter into the soil to provide a nutrient-rich foundation. This will support the initial growth of your rosemary plants.
Once established, rosemary generally doesn’t need additional fertilization. However, if you notice slow growth or pale leaves, you can apply a balanced organic fertilizer sparingly in the early spring. Avoid using excessive nitrogen-based fertilizers, which can promote excessive leaf growth at the expense of flavor and aroma.
Pruning and Maintenance: Regular pruning helps to maintain the shape and vigor of your rosemary plants. Prune the plants in early spring before new growth appears. Remove any dead, damaged, or leggy branches, trimming back to healthy growth. Pruning encourages bushier growth and prevents the plant from becoming woody and sprawling.
Rosemary is a hardy plant, but it’s still important to monitor for pests and diseases. Inspect the foliage regularly for signs of aphids, spider mites, or powdery mildew. If you notice any infestations or disease symptoms, treat them promptly using organic insecticidal soap or appropriate natural remedies.
Overwintering Rosemary: Rosemary is typically hardy in warmer regions but may require protection in colder climates. Before winter arrives, you can mulch around the base of the plant with a layer of organic mulch to insulate the roots and protect them from frost. In extremely cold regions, you may need to cover the plants with burlap or bring potted rosemary indoors for the winter.
Conclusion
By incorporating these five mosquito-repelling plants into your garden, you can enjoy outdoor activities without worrying about pesky bugs. Remember to choose a suitable location, provide adequate sunlight and water, and fertilize as needed. By creating a bug-free oasis in your backyard, you’ll not only benefit from a beautiful garden but also create a pleasant and inviting space for your family and friends to enjoy. Happy gardening!
Subscribe now to never miss a post from Skillful Living…


